How to make a DIY concrete plant pot using your gym ball
If you’re a plant lover you’ll know that every beautiful houseplant needs a beautiful pot to match, but finding one that suits your tastes isn’t always easy. Larger planters don’t come cheap either, which makes finding one that’s both stylish and affordable feel like mission impossible. Sound familiar? Then you might want to consider putting your DIY skills to the test and making your own…
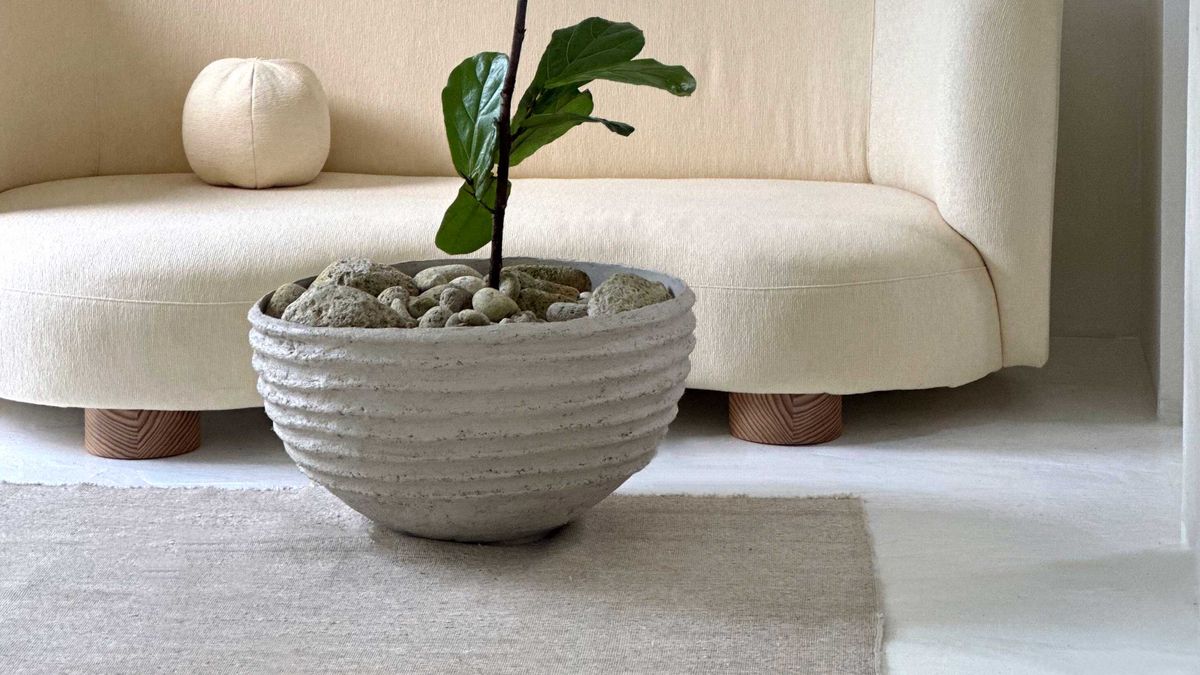
That’s exactly what interior designer and home DIY-er Erena Te Paa (@erenatepaa) did to make the perfect rustic planter for her modern home, and all it took was some concrete mix, a gym ball, and some rope (plus a little bit of know-how).
Sharing her DIY idea on an Instagram reel, she demonstrates how she made the planter by molding concrete mix around a ball and adding a ribbed detail using the rope. We couldn’t get enough of the artisanal look that’s so perfect for decorating with plants, so we asked Erena to share a few more details on how she did it.

Erena Te Paa is an interior stylist with a passion for DIY projects and design. Whether it’s art for the wall or a re-imagined piece of furniture, Erena’s home is a canvas for her creativity and style. Here, she explains how she put her DIY skills to the test by making a beautiful concrete planter with the help of a gym ball
How to turn a gym ball into a concrete planter
The idea started as Erena’s solution to her own futile planter hunt, and the result is better than any search could ever accomplish. The rounded shape and rustic feel of the DIY version fits perfectly within her neutral Scandi decor style that’s full of curved lines and rough textures.
So how is it done? Really, it’s quite simple. Think the papier-mâché balloon casts of your childhood but on a much larger scale. Erena started by inflating a gym ball and standing on a curved surface so it was sturdy. We like this 33-inch gym ball complete with pump, from Amazon. Before she plastered it with the concrete mixture, she oiled the surface using olive oil so that it could easily be removed once the mix had dried.
Next, it was a case of mixing the concrete. ‘I used what I had on hand which consisted of a feather-finish cement by Ardex and then a fibercrete cement,’ Erena explains. ‘The fibercrete is more coarse and in truth, I found mine a little less workable than I’d have liked.’
Instead, Erena recommends using a smooth all-purpose cement with a quick dry-time, like this one from the Home Depot. ‘I’d work in small batches so as to not mix more cement than can easily be applied,’ she says. ‘If in doubt, ask your local hardware store for suitable product options.’
Once you have a thick but moldable mix, it’s time for the fun part. You’ll need to use strips of fiberglass tape and fabric offcuts to plaster around the ball. The textured material is what gives the finished result that modern rustic feel. Start with a thin layer of concrete mix covering half of the ball (or up to your desired height, if you want the shape to be more spherical).
‘Take your time creating the base layer for your pot as this is what gives the cement its structure and strength and will ultimately contribute to the lifespan of your finished piece,’ Erena says. ‘Further layers will add both weight and thickness but they too rely on that first layer being solid.’
Add strips of fabric and fiberglass tape on top, plastering it with plenty of cement mixture as you go. This step is essential if you want your planter to be strong and durable enough to hold your best houseplants. ‘It’s all about reinforcement,’ Erena explains. ‘I’ve used fiberglass tape in plastering before to help give the plaster something to bind with and grip onto. In terms of working with cement I used the cloth and the tape in a similar sense to help reinforce the structure of the pot.’
Once the plastering is done, add the rope while the mixture is still wet. Erena used lengths of rope around the circumference of the ball, pressing it into the cement so that it dried into the cement. She also attaches a concrete slab to what will make the bottom of the planter so that it stands up. Once the mixture was dry, she reinforced the edges of the rope with a glue gun.
All that’s left is a waiting game. In general, you’ll want to wait 24-48 hours before your concrete has fully set. At this point, you can remove the stopper from the gym ball, deflate it, and peel it away.
As long as the oiling step is done properly, it’s perfectly possible for the gym ball to still be usable once you’ve made the planter. ‘In the same way that you wouldn’t want a cake to stick to the pan once it’s baked, this really comes down to how well you oil your ball, deflating the ball as soon as the cement has dried (or when the ball pulls away) and cleaning the gym ball as soon as it’s been removed,’ Erena explains.
You should now be left with a solid, bowl-shaped planter with a beautiful ribbed detail around the edges. If the industrial concrete vibe isn’t for you, it’s up to you if you want to paint it to suit your color scheme. Erena used a simple coat of white paint, thinly covering the planter for a distressed rustic look, but you can use any color. It’s a good idea to use a primer first, though.
And there you have it; the perfect planter in just a few simple steps using materials you probably already have lying around. If your New Year’s resolution is to get more crafty, we reckon this is the ideal weekend project this January.


